What if a few simple changes could help your Cedar Ridge home stand out and sell faster, even in a slower market? In the Sierra foothills, buyers respond to spaces that feel bright, safe, and connected to the outdoors. When you stage with those goals in mind, you make it easier for buyers to say yes.
In this guide, you’ll learn how to highlight views, make decks feel like another living room, showcase wood and stone the right way, and prepare for photos and showings. You’ll also see which light updates pay off here and how to plan your timeline. Let’s dive in.
Know your Cedar Ridge buyer
Cedar Ridge sits in the higher elevations of Tuolumne County at roughly 3,700 to 4,000 feet. The setting brings tall pines, cooler summers, and some steep lots with views of the hills and treetops. You are marketing a foothill lifestyle first, then the house. Local maps confirm the elevation and terrain, and community resources frame the area as a foothills neighborhood with outdoor access and rural infrastructure. You can reference local community context at the Cedar Ridge community page.
County data shows a value‑sensitive market where days on market can run longer than big metros. That means standout photos and clear staging make a real difference in the number of showings you get. Demographic data also points to a mix of full‑time owners and second‑home buyers, including retirees, which matches what you see at showings. For context on local population and housing characteristics, review Tuolumne County QuickFacts.
What most foothill buyers want to see:
- A strong indoor to outdoor connection with usable decks and patios.
- Clear, safe views through clean windows and trimmed sightlines.
- Wood and stone details that feel warm but bright and current.
- Flexible bonus rooms that clearly solve for work, guests, or hobbies.
- Practical safety features and wildfire readiness that support insurance and peace of mind.
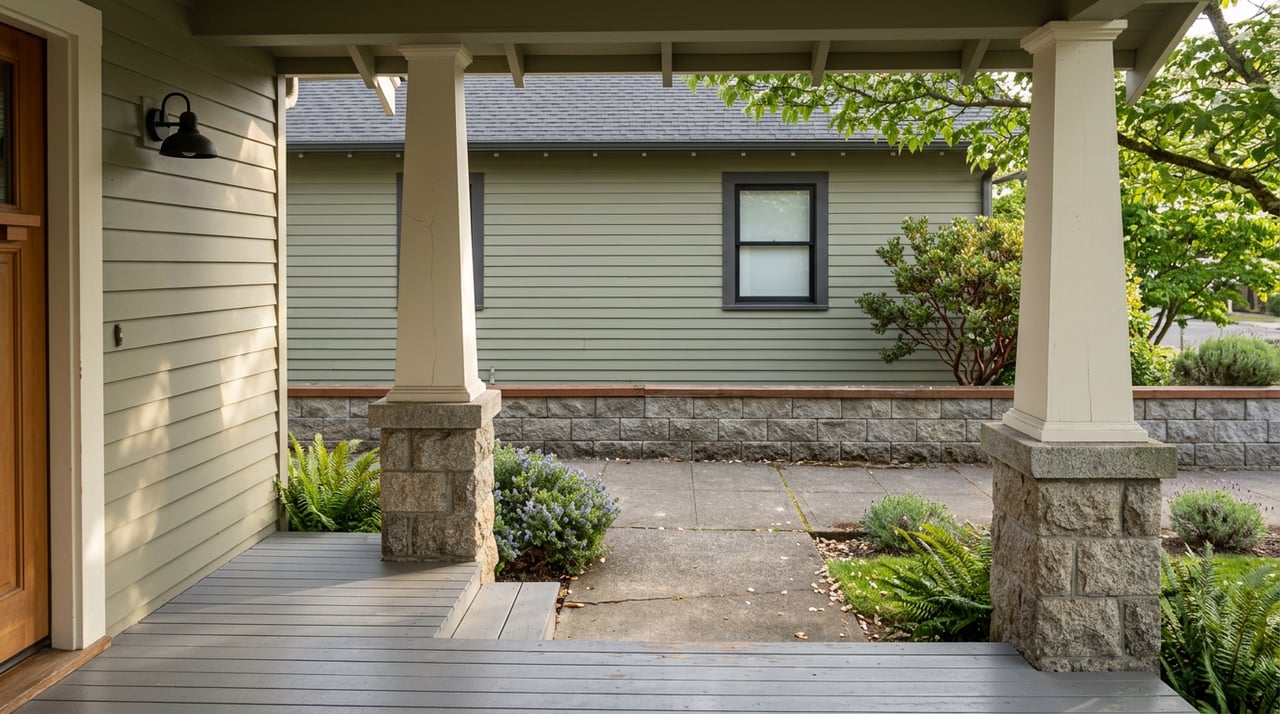
Stage for views and outdoor living
Buyers will pay more attention to your listing if your photos show wide views and a deck that looks like a second living room.
Open sightlines through windows
- Remove heavy drapery and valances that block light. Use simple, neutral window treatments.
- Deep clean windows inside and out so the glass disappears. This helps online photos pop, which boosts click‑through and showings. See practical photo prep guidance from real estate photography experts.
- If shrubs or branches block a prime view, prune selectively to frame it. Do this after checking fire safety guidance in the wildfire section below.
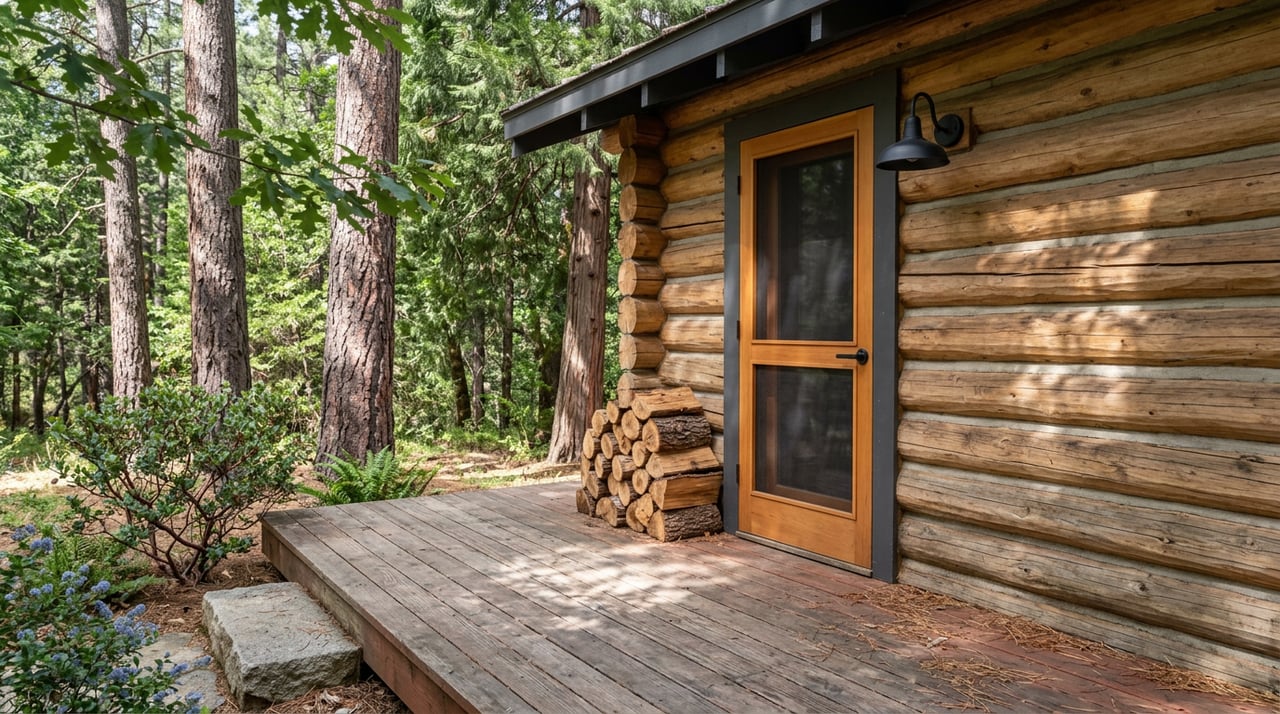
Make your deck a destination
- Create one or two clear vignettes: a dining setup and a lounge seating area with cushions and a rug to define the zone.
- Add simple string lights for evening ambiance and a tidy, gas fire feature where it makes sense.
- Sweep, hide hoses and tools, and style wood stacks neatly or remove them for photo day. National cost‑vs‑value data consistently shows outdoor projects photograph well and support buyer interest. Review exterior project impact at Cost vs Value.
Light it for day and twilight
- Ask your photographer to capture both day and twilight deck shots to show how the space lives after sunset. Twilight scenes are proven attention‑getters in listing galleries. Learn why great media matters from marketing pros focused on real estate visuals.
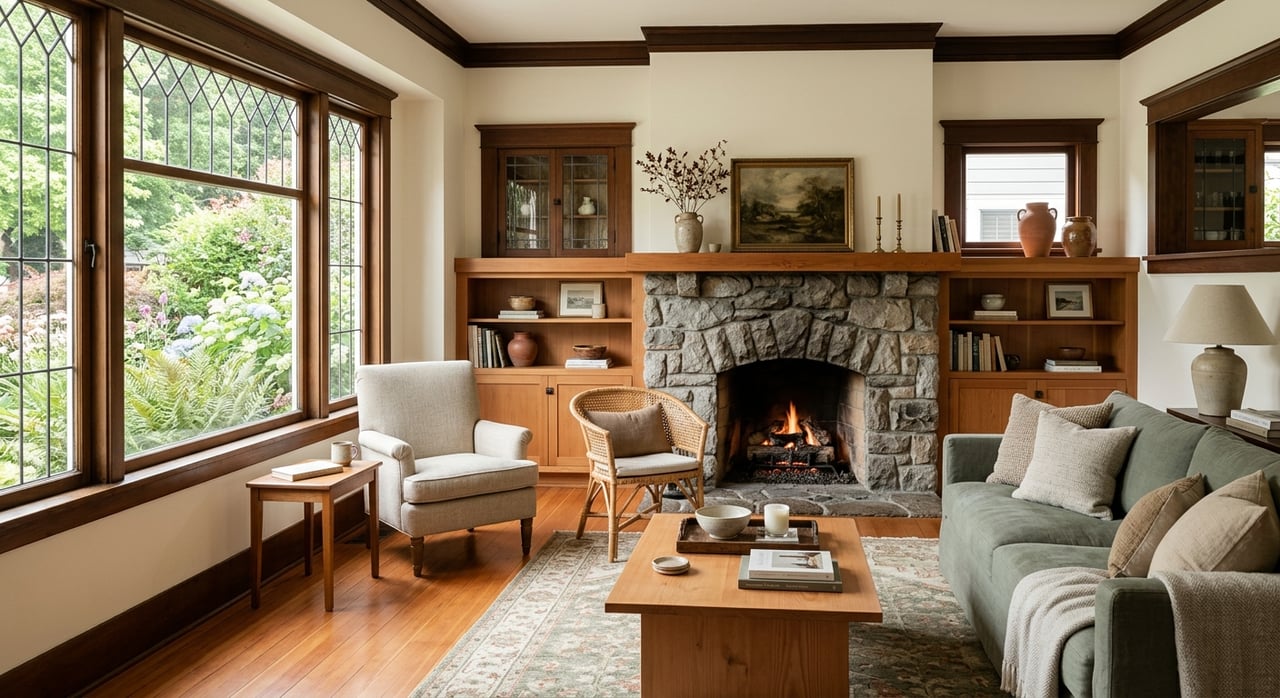
Make wood and stone shine
Cedar Ridge homes often feature beam ceilings, tongue‑and‑groove paneling, and stone fireplaces. These are assets when you brighten and balance them.
- Deep clean and lightly polish exposed wood to bring out tone without adding gloss.
- Use contrast: light sofas, neutral rugs, airy bedding, and simple lamps. This keeps the room bright without hiding rustic character.
- Add a few modern accents, like a matte black or brushed metal lamp and a glass vase. One styled vignette facing a beam or stone wall helps photographers capture a hero detail. For inspiration on balancing texture and light, see examples from a home staging resource library.
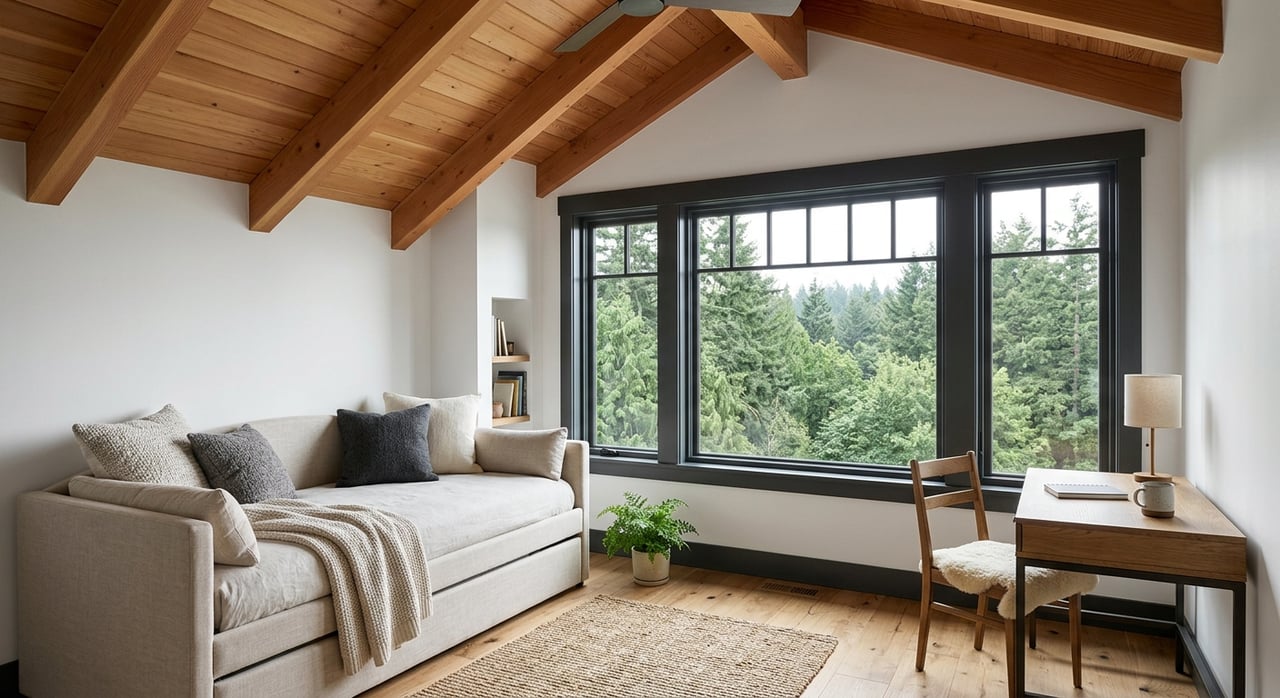
Turn bonus rooms into clear solutions
Buyers want flexibility, but photos need one clear story. Choose a single use per bonus room and stage to that idea.
- Office: simple desk, task chair, small rug, and a plant. Hide cords and extras.
- Guest or bunk room: one bed with neutral bedding and a small dresser or bench. Keep open floor space visible.
- Hobby space: one table, one shelf, and good light. No piles or storage in photos.
Data from national staging surveys shows living areas and the primary bedroom rank highest for impact, but a well‑defined flex space can tip a decision. See findings in the NAR Profile of Home Staging.
Safety sells: show wildfire readiness
Wildfire risk is a real consideration in Tuolumne County. Buyers and insurers both look for proof of defensible space and basic home hardening.
- Follow California guidance on defensible space around structures. Clear combustibles under decks, maintain appropriate spacing, and prune tree canopies where needed. Review practical steps from the state’s consumer guidance on wildfire preparedness.
- Document what you complete. Keep dated photos and any inspection notes. In your listing description, call out recent defensible space work and simple hardening upgrades.
- If you plan any view trimming, coordinate with safety rules first. Selective pruning can open sightlines without removing mature trees.
Photo plan and showing prep
Great media tells the foothill story in seconds. Plan your shot list and prep the house so every image counts.
Must‑have shots
- Wide exterior that shows the home in the landscape and the driveway approach.
- Deck or porch by day and at twilight to highlight outdoor living and warm lighting.
- Aerial images to show lot context, slope, and access to roads or recreation. These views help buyers understand privacy and setting. Learn how aerials add value from specialists in real estate drone photography.
- Interior wides of the living room, kitchen, and primary bedroom that include windows and sightlines.
- Detail shots of a beam, stone fireplace, cabinetry, bath finishes, and the staged bonus room. See framing and prep tips from real estate photo pros.
Day‑of checklist
- Exterior: sweep decks and steps, hide hoses and bins, stage seating, and prep lights for twilight.
- Windows and light: clean panes inside and out, open all shades, replace burnt bulbs, and set consistent bulb color.
- Interiors: clear counters, remove most personal photos, make beds, and add a few fresh plants. Keep styling minimal and camera friendly. For simple composition ideas, browse examples from a staging best‑practice gallery.
- Occupied vs. vacant: if vacant, consider professional staging or high‑quality virtual staging where allowed, and disclose virtual staging per MLS rules. The NAR staging report outlines typical spend and benefits.
Showings for full‑time and second homes
- Full‑time residence: set consistent showing windows, keep utilities on, and have a local contact ready for last‑minute tweaks.
- Second home: use a local caretaker or property manager to open the house, turn on utilities, and do a quick tidy before each showing. If winterized, schedule de‑winterization before photography and the first showings.
High‑impact updates that pay off here
In a value‑sensitive market, choose smaller updates that show well in photos and offer solid cost recoup.
Curb appeal first
- Replace a tired garage or entry door, refresh the front steps, and update the house numbers and exterior lights. Exterior projects lead recoup rates nationally and make a strong first impression. See project returns at Cost vs Value.
Strengthen outdoor living
- Repair or replace worn rails, sand rough spots, and apply a fresh stain or finish. Add a compact composite or wood platform where it makes sense. Deck and patio improvements often score well with buyers and appraisers, according to Cost vs Value.
Minor kitchen refresh
- Paint dated cabinets, install modern hardware, consider new counters in a durable, neutral finish, and update a faucet and two lighting fixtures. A minor kitchen redo is a frequent top performer in the Cost vs Value tables because it photographs well and feels move‑in ready.
Home hardening and maintenance
- Install ember‑resistant vents, clear under‑deck areas, and service the roof and gutters. These are practical upgrades you can spotlight in the listing. Review guidance from the state on home hardening and defensible space.
Avoid large, highly customized additions that push beyond neighborhood norms. Use a local CMA and recent comps to confirm that any bigger investment will likely return value.
A simple three‑month staging timeline
Use this as a starting point and adjust for your home’s condition and budget.
- 6 to 12 weeks out: meet with your agent to confirm pricing and staging plan. Schedule roof, gutter, deck, and handrail fixes. Book your photographer, including twilight and drone options. Plan a deep clean and gather permits and receipts for safety or remodel work. See why staged, photo‑ready homes tend to perform better in the NAR staging profile. Check defensible space needs with local fire authorities before trimming.
- 2 to 4 weeks out: complete staging, finish light landscaping, and lock in photo day for golden hour plus twilight. Confirm a lockbox or a trusted local contact for showings. Get more photo‑day tips from real estate marketing pros.
- Photo day to listing day: verify utilities are on. Provide your agent with staging receipts and wildfire documentation for buyer packets. The staging report from NAR also highlights buyer reactions you can aim for in your listing description.
Common pitfalls to avoid
- Blocking light with heavy drapes or oversized furniture that hides windows and views.
- Over‑decorating decks with too many small pieces that read as clutter in photos.
- Storing firewood against the house or under decks. Move it away during listing. See state guidance for reducing combustibles in the wildfire prep resource.
- Forgetting utilities for showings. Keep lights and heat on so the home feels inviting.
- Over‑improving with luxury upgrades that outpace local comps.
Ready to list with confidence?
With the right staging plan, your Cedar Ridge home can connect quickly with the foothill buyers who value views, outdoor living, and safe, low‑maintenance spaces. If you want a clear, step‑by‑step strategy tailored to your property, reach out to the local team that lives and works here. Start with a pricing review and a custom staging checklist from Healy Homes, Inc.. Request Your Free Home Valuation.
FAQs
What do Cedar Ridge buyers value most during showings?
- Buyers focus on bright rooms, open sightlines to views, and a deck that lives like another room. They also look for clear wildfire readiness and practical upkeep.
How should I handle trees or shrubs that block views in Cedar Ridge?
- Trim selectively to frame the best sightlines after confirming local defensible space guidance. Document work with photos and keep any inspection notes for buyers.
What is the best way to stage exposed wood interiors without making them feel dark?
- Clean and lightly polish wood, use light textiles and rugs for contrast, add simple lamps, and keep accessories minimal so the wood reads as a feature, not a weight.
Which small updates usually deliver the best return here?
- Curb appeal fixes, deck repairs or fresh stain, and a minor kitchen refresh tend to show well in photos and often recoup better than large, custom projects.
How should I prepare a second home for photos and buyer tours?
- Arrange a local caretaker to turn on utilities, tidy before appointments, and manage access. If winterized, schedule de‑winterization before the shoot and first showings.